Neste tutorial vamos ver como podemos adicionar banners com as seguintes particularidades:
- Imagem
- Título
- Descrição
- Texto do botão
- Link
- Alinhamento
Para o layout Base, criamos um componente exclusivo para os banners que, dependendo de onde o usamos, o mostramos de maneiras diferentes, como nos Banners de categorias e nos módulos de Imagem e texto.

Neste tutorial vamos pegar o exemplo dos banners para categorias, onde teremos 3 banners com todos os elementos que listamos acima, na mesma linha dentro do conteúdo da página inicial. E você tem uma opção geral, para configurar o componente utilizando 100% da tela, mostrando os banners sem margens laterais.
HTML
1. A primeira coisa que vamos fazer é criar a pasta home dentro da pasta snipplets e depois adicionar o snipplet home-banners.tpl com o seguinte código:
<section class="section-banners-home">
    <div class="container{% if settings.banners_full %}-fluid p-0{% endif %}">
        <div class="row {% if settings.banners_full %}no-gutters{% endif %} align-items-center">
            {% set num_banners = 0 %}
            {% for banner in ['banner_01', 'banner_02', 'banner_03'] %}
                {% set banner_show = attribute(settings,"#{banner}_show") %}
                {% set banner_title = attribute(settings,"#{banner}_title") %}
                {% set banner_button_text = attribute(settings,"#{banner}_button") %}
                {% set has_banner =  banner_show and (banner_title or banner_description or "#{banner}.jpg" | has_custom_image) %}
                {% if has_banner %}
                    {% set num_banners = num_banners + 1 %}
                {% endif %}
            {% endfor %}

            {% for banner in ['banner_01', 'banner_02', 'banner_03'] %}
                {% set banner_show = attribute(settings,"#{banner}_show") %}
                {% set banner_title = attribute(settings,"#{banner}_title") %}
                {% set banner_description = attribute(settings,"#{banner}_description") %}
                {% set banner_button_text = attribute(settings,"#{banner}_button") %}
                {% set banner_url = attribute(settings,"#{banner}_url") %}
                {% set has_banner =  banner_show and (banner_title or banner_description or "#{banner}.jpg" | has_custom_image) %}
                {% set has_banner_text =  banner_title or banner_description or banner_button_text %}
                {% if has_banner %}
                    <div class="col-md">
                        <div class="textbanner">
                            {% if banner_url %}
                                <a class="textbanner-link" href="{{ banner_url }}"{% if banner_title %} title="{{ banner_title }}" aria-label="{{ banner_title }}"{% else %} title="{{ 'Banner de' | translate }} {{ store.name }}" aria-label="{{ 'Banner de' | translate }} {{ store.name }}"{% endif %}>
                            {% endif %}
                            {% if store.thumbnails_enabled %}
                                <div class="textbanner-image{% if has_banner_text and textoverimage %} overlay{% endif %} lazyautosizes lazyload blur-up"{% if "#{banner}.jpg" | has_custom_image %} data-bgset='{{ "#{banner}.jpg" | static_url | settings_image_url('large') }} 480w, {{ "#{banner}.jpg" | static_url | settings_image_url('huge') }} 640w' data-sizes="auto" style="background-image: url({{ "#{banner}.jpg" | static_url | settings_image_url('tiny') }});"{% endif %}>
                            {% else %}
                                <div class="textbanner-image{% if has_banner_text and textoverimage %} overlay{% endif %} lazyload blur-up"{% if "#{banner}.jpg" | has_custom_image %} data-bg='{{ "#{banner}.jpg" | static_url }}' style="background-image: url({{ "#{banner}.jpg" | static_url | settings_image_url('tiny') }});" {% endif %}>
                            {% endif %}
                            </div>
                            <div class="textbanner-text{% if textoverimage %} over-image{% endif %}">
                                {% if banner_title %}
                                    <div class="h1 textbanner-title">{{ banner_title }}</div>
                                {% endif %}
                                {% if banner_description %}
                                    <div class="textbanner-paragraph">{{ banner_description }}</div>
                                {% endif %}
                                {% if banner_url and banner_button_text %}
                                    <button class="btn btn-line btn-small">{{ banner_button_text }}</button>
                                {% endif %}
                            </div>
                            {% if banner_url %}
                                </a>
                            {% endif %}
                        </div>
                    </div>
                {% endif %}
            {% endfor %}
        </div>
    </div>
</section>
Onde criamos um loop para construir os banners um por um, dependendo da informação que cada um possui. No caso de criar outros com nomes diferentes (neste exemplo são chamados: banner_01, banner_02 e banner_03), podemos modificá-los a partir do for que os define:
{% for banner in ['banner_01', 'banner_02', 'banner_03'] %}2. E então precisamos chamar o snipplet do banner no template templates/home.tpl, no local que você preferir dentro do seu layout.
{% include 'snipplets/home/home-banners.tpl' %}CSS
Requisito:
Ter adicionado helper classes em seu layout. Você pode seguir este pequeno tutorial para fazer isso (é só copiar e colar algumas classes, não leva mais que 1 minuto).
1. Adicione os estilos no arquivo static/style-critical.tpl
Se em seu layout você usar um stylesheet para o CSS crítico, precisaremos do seguinte código dentro dele, mas se não for o caso, você poderá unificar o CSS dos passos 1 e 2 em um único arquivo.
{# /* // Home banners */ #}

.textbanner {
  position: relative;
  margin-bottom: 20px;
  overflow: hidden;
}
.textbanner-link {
  display: block;
  width: 100%;
  height: 100%;
}
.textbanner-image {
  position: relative;
  padding-top: 100%;
  background-position: center;
  background-repeat: no-repeat;
  background-size: cover;
}
.textbanner-text {
  position: relative;
  padding: 0 5% 45px 5%;
  text-align: center;
}
.textbanner-text.over-image {
  position: absolute;
  top: 50%;
  left: 50%;
  z-index: 9;
  width: 100%;
  color: #fff;
  transform: translate(-50%, -50%);
}
.textbanner-title {
  margin-bottom: 15px;
  line-height: 34px;
}
.textbanner-paragraph {
  display: -webkit-box;
  margin-bottom: 15px;
  line-height: 18px;
  overflow: hidden;
  text-overflow: ellipsis;
  -webkit-line-clamp: 3;
  -webkit-box-orient: vertical;
}


{# /* // Min width 768px */ #}

@media (min-width: 768px) {

  {# /* //// Banners */ #}

  {# /* Home Banners */ #}

  .textbanner-text {
    padding: 30px 20%;
  }
}
2. Adicione os estilos dentro do arquivo static/style-async.tpl
Se em seu layout você usar um stylesheet CSS assíncrono, precisaremos do seguinte código, caso não seja possível unificá-lo com na etapa anterior.
{# /* // Mixins */ #}


{# This mixin adds browser prefixes to a CSS property #}

@mixin prefix($property, $value, $prefixes: ()) {
  @each $prefix in $prefixes {
    #{'-' + $prefix + '-' + $property}: $value;
  }
  #{$property}: $value;
}

{# /* // Banners */ #}


.textbanner {
  .textbanner-image.overlay {
    @include prefix(transition, all 0.8s ease, webkit ms moz o);
  }
  &:hover .textbanner-image.overlay,
  &:focus .textbanner-image.overlay {
    @include prefix(transform, scale(1.03), webkit ms moz o);
  }
}
3. Adicionamos o seguinte SASS de cores em style-colors.scss.tpl (ou no stylesheet do seu layout que possui as cores e fontes da loja). Lembre-se de que as variáveis de cores e fontes podem variar em relação ao seu layout:
{# This mixin adds browser prefixes to a CSS property #}


@mixin prefix($property, $value, $prefixes: ()) {
    @each $prefix in $prefixes {
        #{'-' + $prefix + '-' + $property}: $value;
    }
       #{$property}: $value;
}


{# /* // Buttons */ #}


.btn{
  text-decoration: none;
  text-align: center;
  border: 0;
  cursor: pointer;
  -webkit-appearance: none;
  -moz-appearance: none;
  appearance: none;
  text-transform: uppercase;
  background: none;
  @include prefix(transition, all 0.4s ease, webkit ms moz o);
  &:hover,
  &:focus{
    outline: 0;
    opacity: 0.8;
  }
  &[disabled],
  &[disabled]:hover{
    opacity: 0.5;
    cursor: not-allowed;
    outline: 0;
  }
  &-default{
    padding: 10px 15px;
    background-color: rgba($main-foreground, .2);
    color: $main-foreground;
    fill: $main-foreground;
    font-weight: bold;
  }
  &-block{
    float: left;
    width: 100%;
  }
  &-small{
    display: inline-block;
    padding: 10px;
    font-size: 10px;
    letter-spacing: 2px;
  }
  &-line{
    padding: 10px 0;
    color: $main-background;
    fill: $main-background;
    letter-spacing: 4px;
    border-bottom: 2px solid;
  }
}
JS
Como neste tutorial usamos a técnica de lazy load com o plugin Lazysizes, precisamos adicioná-lo. Para ver como fazer isso, você pode ler este pequeno artigo e continuar com este tutorial.
Configurações
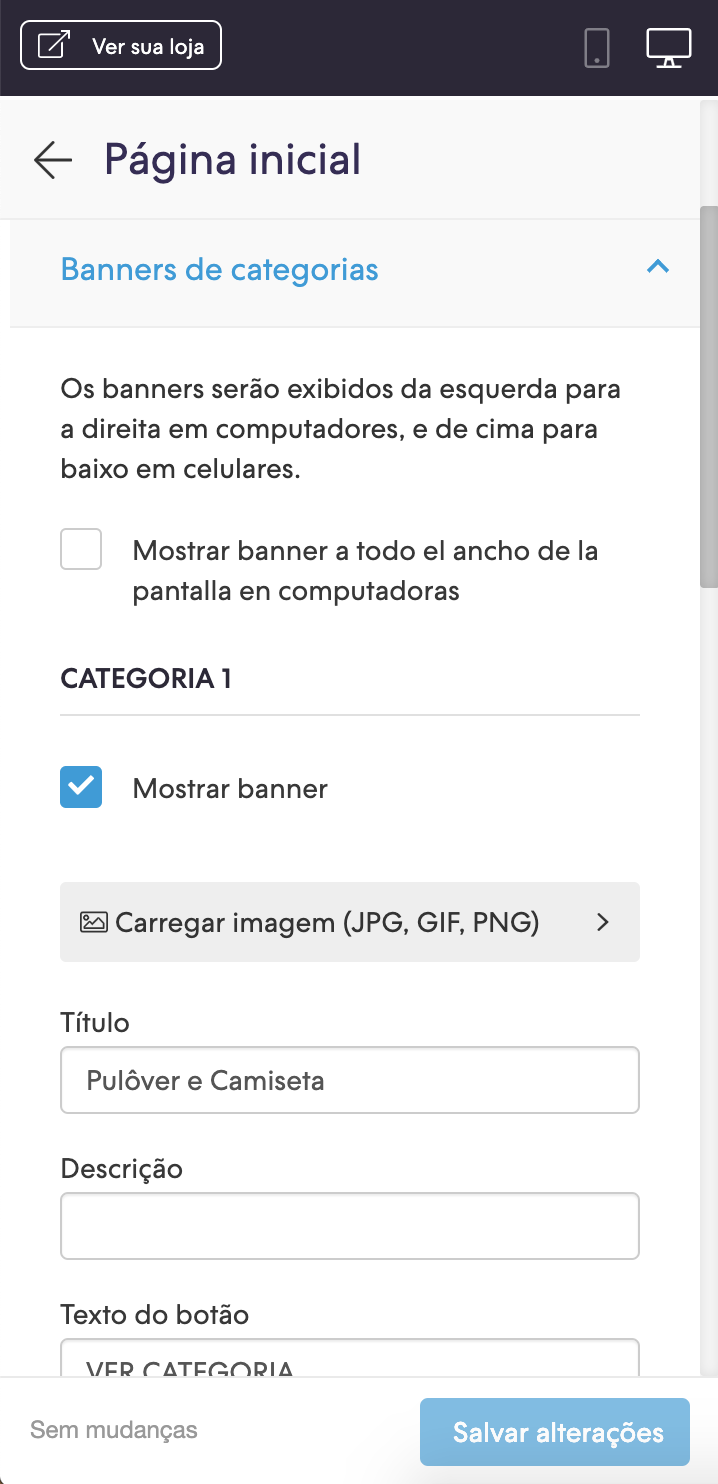
No arquivo config/settings.txt, adicionaremos todos os campos dos 3 banners com suas características. Vamos adicioná-los na seção Página inicial.
collapse
        title = Banners de categorías
    description
        description = Los banners se mostrarán de izquierda a derecha en computadoras y de arriba hacia abajo en celulares
    checkbox
        name = banners_full
        description = Mostrar banner a todo el ancho de la pantalla en computadoras
    subtitle
        subtitle = CATEGORÍA 1
    checkbox
        name = banner_01_show
        description = Mostrar banner
    image
        original = banner_01.jpg
        title = Cargar imagen (JPG, GIF, PNG)
        width = 600
        height = 600
    i18n_input
        name = banner_01_title
        description = Título
    i18n_input
        name = banner_01_description
        description = Descripción
    i18n_input
        name = banner_01_button
        description = Texto del botón
    i18n_input
        name = banner_01_url
        description = Link
    dropdown
name = banner_01_align
description = Alineación del texto
values
                left = Izquierda
                center = Centrado
                   right = Derecha


    subtitle
        subtitle = CATEGORÍA 2
    checkbox
        name = banner_02_show
        description = Mostrar banner
    image
        original = banner_02.jpg
        title = Cargar imagen (JPG, GIF, PNG)
        width = 600
        height = 600
    i18n_input
        name = banner_02_title
        description = Título
    i18n_input
        name = banner_02_description
        description = Descripción
    i18n_input
        name = banner_02_button
        description = Texto del botón
    i18n_input
        name = banner_02_url
        description = Link
    dropdown
name = banner_02_align
description = Alineación del texto
values
                left = Izquierda
                center = Centrado
                   right = Derecha


    subtitle
        subtitle = CATEGORÍA 3
    checkbox
        name = banner_03_show
        description = Mostrar banner
    image
        original = banner_03.jpg
        title = Cargar imagen (JPG, GIF, PNG)
        width = 600
        height = 600
    i18n_input
        name = banner_03_title
        description = Título
    i18n_input
        name = banner_03_description
        description = Descripción
    i18n_input
        name = banner_03_button
        description = Texto del botón
    i18n_input
        name = banner_03_url
        description = Link
    dropdown
name = banner_03_align
description = Alineación del texto
values
                left = Izquierda
                center = Centrado
                   right = Derecha
Traduções
Nesta etapa, adicionamos os textos para as traduções no arquivo config/translations.txt.
es "Los banners se mostrarán de izquierda a derecha en computadoras y de arriba hacia abajo en celulares"
pt "Os banners serão exibidos da esquerda para a direita em computadores, e de cima para baixo em celulares."
en "Banners will be displayed from left to right on desktop and from top to bottom on mobile"

es "Banners de categorías"
pt "Banners de categorias"
en "Categories banners"
es_mx "Banners de categorías"


es "CATEGORÍA 1"
pt "CATEGORIA 1"
en "CATEGORY 1"
es_mx "CATEGORÍA 1"


es "CATEGORÍA 2"
pt "CATEGORIA 2"
en "CATEGORY 2"
es_mx "CATEGORÍA 2"


es "CATEGORÍA 3"
pt "CATEGORIA 3"
en "CATEGORY 3"
es_mx "CATEGORÍA 3"


es "Mostrar banner"
pt "Mostrar banner"
en "Show banner"
es_mx "Mostrar el banner"


es "Imagen de fondo"
pt "Imagem de fundo"
en "Background image"
es_mx "Imagen de fondo"


es "Cargar imagen (JPG, GIF, PNG)"
pt "Carregar imagem (JPG, GIF, PNG)"
en "Upload image (JPG, GIF, PNG)"
es_mx "Cargar imagen (JPG, GIF, PNG)"


es "Título"
pt "Título"
en "Title"
es_mx "Título"


es "Descripción"
pt "Descrição"
en "Description"
es_mx "Descripción"


es "Texto del botón"
pt "Texto do botão"
en "Button text"
es_mx "Texto del botón"


es "Link"
pt "Link"
en "Link"
es_mx "Link"


es "Alineación del texto"
pt "Alinhamento do texto"
en "Text align"
es_mx "Alineación del texto"


es "Izquierda"
pt "Esquerda"
en "Left"
es_mx "Izquierda"


es "Centrado"
pt "Centralizado"
en "Center"
es_mx "Centrado"


es "Derecha"
pt "Direita"
en "Right"
es "Derecha"
Ativação
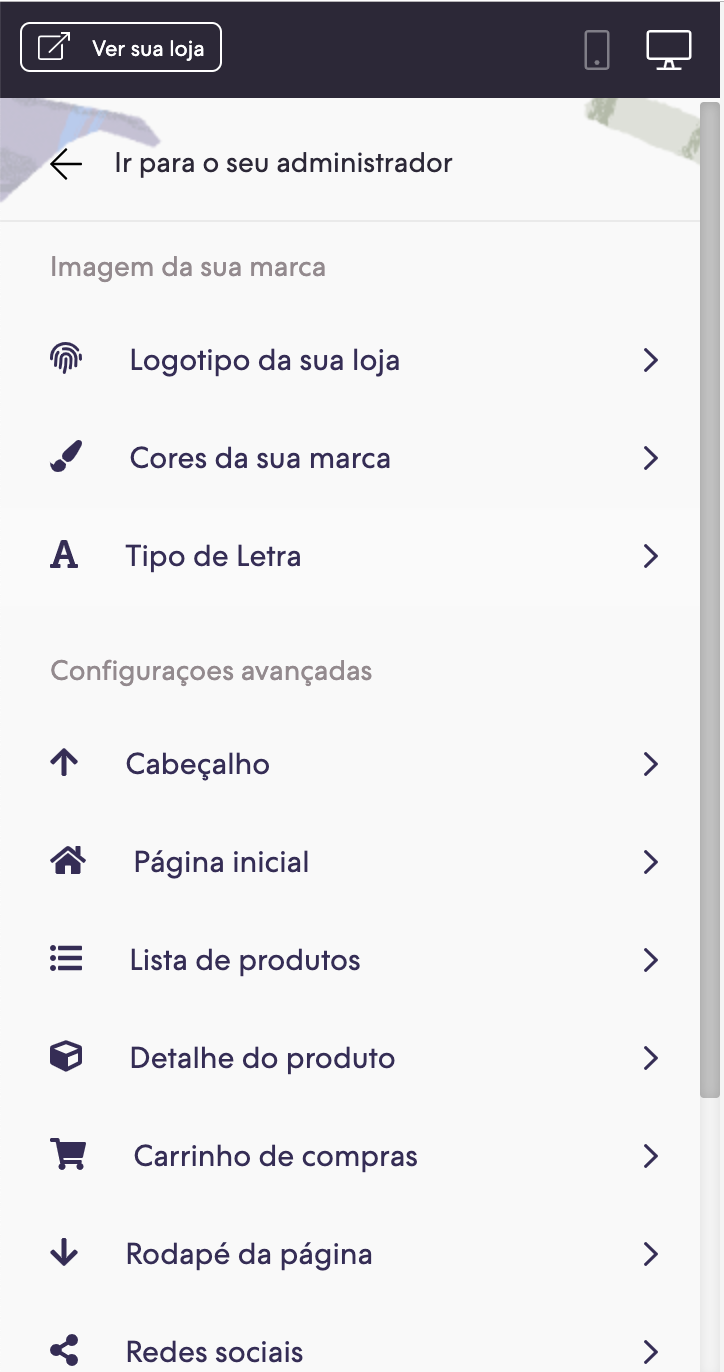
Por último, você pode ativar o vídeo no Administrador Nuvem, na seção ‘Personalizar seu layout atual’ dentro de ‘Página inicial’: